
Configuration
This section will cover basic configuration of the server.
General Configuration
Section titled “General Configuration”Change branding of the server
Section titled “Change branding of the server”Web Interface (Sunset) changes
Section titled “Web Interface (Sunset) changes”To change the branding of the web interface, you can do multiple changes:
Change server’s name
Section titled “Change server’s name”Open the Sunset/app/i18n.config.json file and update the following values:
appName.text- The name of the server. Shown in the browser tab title and used in general UI.serverTitle.full.text- The title of the server.serverTitle.split.part1.text- The first part of the server title. Used on the home page.serverTitle.split.part2.text- The second part of the server title. Used on the home page. If you want your title to be a single word, leave this empty.
Change server’s logo
Section titled “Change server’s logo”- Use any favicon generator, use any search engine to find one.
- For simplicity, we will use realfavicongenerator.net in this guide.
- Upload your logo image (PNG, JPG, SVG, etc.) and click the “Generate” button.
- Click
Nextat the bottom of the page. - Select
Next.jsand download app and public files.
- Replace files in the
Sunset/appandSunset/publicdirectories with the downloaded files following the website instructions.
Change server’s assets
Section titled “Change server’s assets”You can change any website image/video by replacing files in Sunset/public/ directories.
For example, to change the front page mascot image, you can replace Sunset/public/images/frontpage.png file with your own.
Change the website’s colors
Section titled “Change the website’s colors”- Use any Tailwind v3 ShadCN UI theme generator, use any search engine to find one.
- For simplicity, we will use tweakcn.com in this guide.
- Select or manually customize the theme you want.
- Click on the
Codetab and selectTailwind v3andhsloptions. - Press the
Copybutton to copy the code. - Open the
Sunset/app/style.cssfile and replace the content with the copied code.
Sunrise (osu! server) changes
Section titled “Sunrise (osu! server) changes”To change the branding of osu! server, you can do multiple changes:
Update server’s config
Section titled “Update server’s config”You can update the server’s config by editing the Sunrise.Config.Production.json file.
The possible values you can update are:
Bot.Username- The name of the server. Shown in the game chat and used in general UI. Only used at the first server start.General.WelcomeMessage- The welcome message that will be displayed to players when they connect to the server.
Update server’s assets
Section titled “Update server’s assets”You can update the server’s assets by replacing files in the Data/Assets/ directory.
For example, to change the event banner (banner shown on the main menu), you can replace the Data/Assets/EventBanner.png file with your own.
Update server’s seasonal backgrounds
Section titled “Update server’s seasonal backgrounds”You can update the server’s seasonal backgrounds by adding/removing files in the Data/SeasonalBackgrounds/ directory.
If no files are present in the directory, or General.UseCustomBackgrounds is set to false, the server will use osu! Bancho backgrounds.
Sunrise Configuration
Section titled “Sunrise Configuration”Changing the Sunrise.Config.Production.json file
Section titled “Changing the Sunrise.Config.Production.json file”You can change the Sunrise.Config.Production.json file to configure the server.
For example, you can change the bot username:
"Bot": { "Username": "Librarian Bot", ...}Or ignore beatmap ranking (all beatmaps will be ranked!):
"General": { "IgnoreBeatmapRanking": true, ...}Don’t forget to restart the server for the changes to take effect!
How to receive super user privileges? (And admin privileges with it)
Section titled “How to receive super user privileges? (And admin privileges with it)”To receive superuser privileges, please check the sunrise console after starting the server, you should see a message like this at the start:
=====================================================No SuperUser found in the database.To get SuperUser privileges, create a user and run the following command to Server Bot:!claimowner <your-secret-password>=====================================================");If you don’t see this message, it would mean someone else already has superuser privileges.
To receive super user privileges, you need to create a user and run the following command to Server Bot1:
!claimowner <your-secret-password>After which bot should message you with the similar message: Your privilege has been updated to SuperUser.
Superuser privileges will grant you access to the server maintenance commands. Examples of such commands are:
!flushcache- Flushes the cache of the server.!recalculateuserstats all false- Recalculates the user stats of all users.!recalculatescores all false- Recalculates the scores of all users.!recalculateusergrades all false- Recalculates the user grades of all users.!backupdatabase- Backs up the database of the server.!maintenance <off/on>- Enables or disables the maintenance mode of the server.
But you should be interested in the admin privileges, which will grant you access to the admin panel.
Run the following command to Server Bot:
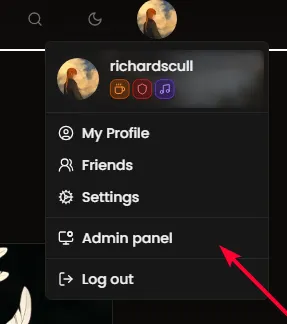
!giveselfprivilege AdminNow, you should be able to access the admin panel by clicking your profile icon in the top right corner, and selecting Admin panel from the dropdown menu.
How to reset superuser?
Section titled “How to reset superuser?”If you lost superuser account access, or want to move the superuser privileges to another user, please add following line to the .env file:
SUNRISE_DEMOTE_SUPERUSER_ON_STARTUP_USE_THIS_IF_SOMEONE_STOLEN_YOUR_SUPERUSER_ACCOUNT=trueAfter that, restart the server, and you should again see the superuser message in the console.
Server Bot1 commands
Section titled “Server Bot1 commands”You can view the list of available commands by typing !help in the PM of Sunshine Bot.
Depending on the privileges you have, you will be able to use different commands.
User- You will be able to use commands that are available to all users. (/np,!best,!with, etc.)Bat- You will be able to use commands that are available to beatmap approval team. (Changing beatmap/beatmapset status)Administrator- You will be able to use commands that are available to administrators. (Restricting users, silencing users, changing their username, etc.)Super User- You will be able to use commands that are available to super users. (Announcing something to all users, flushing cache, recalculating user stats, etc.)
Use Cloudflare headers for the user’s geolocation data
Section titled “Use Cloudflare headers for the user’s geolocation data”By default, the server is using free GeoIP API endpoint which is heavily rate limited. If you are using Cloudflare, it is recommended to use Cloudflare headers for the user’s geolocation data.
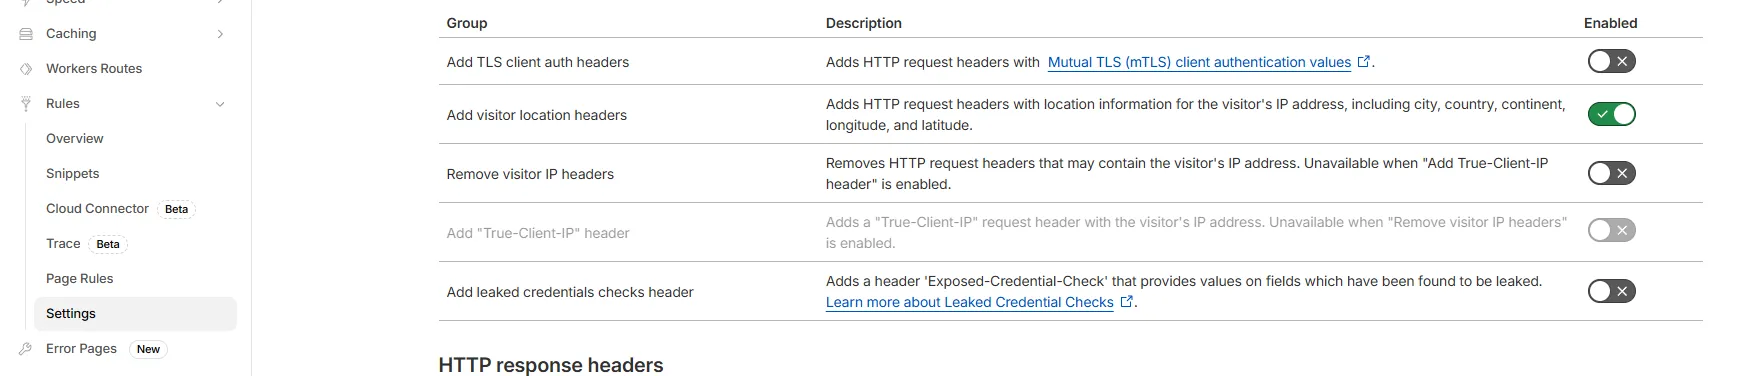
To do so, firstly enable Add visitor location headers in the Cloudflare rules settings.
Then, add the following line to the .env file:
SUNRISE_USE_CLOUDFLARE_HEADERS_FOR_GEOLOCATION=trueAfter that, restart the server for the changes to take effect.
Backup/Applying database changes
Section titled “Backup/Applying database changes”Creating a database backup
Section titled “Creating a database backup”By default, the server is configured to back up the database every day at 03:00 (GMT+0). You can also manually back up the database by running the following command:
!backupdatabaseThis will back up the database to the Database/Backups directory.
Applying database backup
Section titled “Applying database backup”Find the backup snapshot you want to apply, it should be named like Backup_YYYYMMDDHHMMSS.zip.
Inside the backup snapshot, you will find a file named backup_mysql_YYYYMMDDHHMMSS.sql. This is the database backup file.
Get the docker container ID of the database container by running the following command:
docker ps --no-trunc --format "{{.ID}} {{.Names}} {{.Ports}}"And look for the database container, it should be named like osu-sunrise-mysql-sunrise-db-1
de72eaebe131634413be592186f7b5bab3a2b8970ca521394b9a57e77aa9aaa5 osu-sunrise-mysql-sunrise-db-1 33060/tcp, 0.0.0.0:3306->3306/tcpCopy the first part of the container ID, in this case de72eaebe131634413be592186f7b5bab3a2b8970ca521394b9a57e77aa9aaa5
Then run the following command to apply clear all tables before applying the backup:
$ docker exec -it <container_id> mysql -u <root username> --password=<root password> <database_name>DROP DATABASE IF EXISTS <database_name>;CREATE DATABASE <database_name>;The output should be like this:
mysql> DROP DATABASE IF EXISTS sunrise;Query OK, 19 rows affected (0.354 sec)
mysql> CREATE DATABASE sunrise;Query OK, 1 row affected (0.009 sec)
mysql> exitBye
Then apply the backup by running the following command:
$ cat backup_mysql_YYYYMMDDHHMMSS.sql | docker exec -i <container_id> mysql -u <root username> --password=<root password> <database_name>After that, don’t forget to move Data files from backup snapshot to the Data directory.
Now, you can start the server again.
Web Interface (Sunset) w/ Admin Panel
Section titled “Web Interface (Sunset) w/ Admin Panel”How to add/change website’s URLs? (discord server link, uptime monitor link, etc.)
Section titled “How to add/change website’s URLs? (discord server link, uptime monitor link, etc.)”To add/change website’s URLs, you can edit the .env file.
# Optional: URL to your community's Discord server.SUNSET_NEXT_PUBLIC_DISCORD_LINK=# Optional: Link to your osu! osu server list page.SUNSET_NEXT_PUBLIC_OSU_SERVER_LIST_LINK=# Optional: Your Ko-fi donation page URL.SUNSET_NEXT_PUBLIC_KOFI_LINK=# Optional: Your Boosty.to page URL.SUNSET_NEXT_PUBLIC_BOOSTY_LINK=# Optional: Your status page link. If you you are using uptime kuma from the docker-compose, you can set it to https://uptime.{WEB_DOMAIN}SUNSET_NEXT_PUBLIC_STATUS_PAGE_LINK=Accessing the Admin Panel
Section titled “Accessing the Admin Panel”To access the admin panel, open your web browser and navigate to your web interface URL, which is usually https://<your WEB_DOMAIN>.
Login as your administrator user, if you don’t have one, please follow the How to receive super user privileges? (And admin privileges with it) section.
Click on your profile icon in the top right corner, and select Admin panel from the dropdown menu.
And from here you can manage your server and view player statistics.
Beatmap Management
Section titled “Beatmap Management”You can open any beatmap by clicking on its name in the list. This will open a page with detailed information about the beatmap, including its metadata, difficulty, and more.
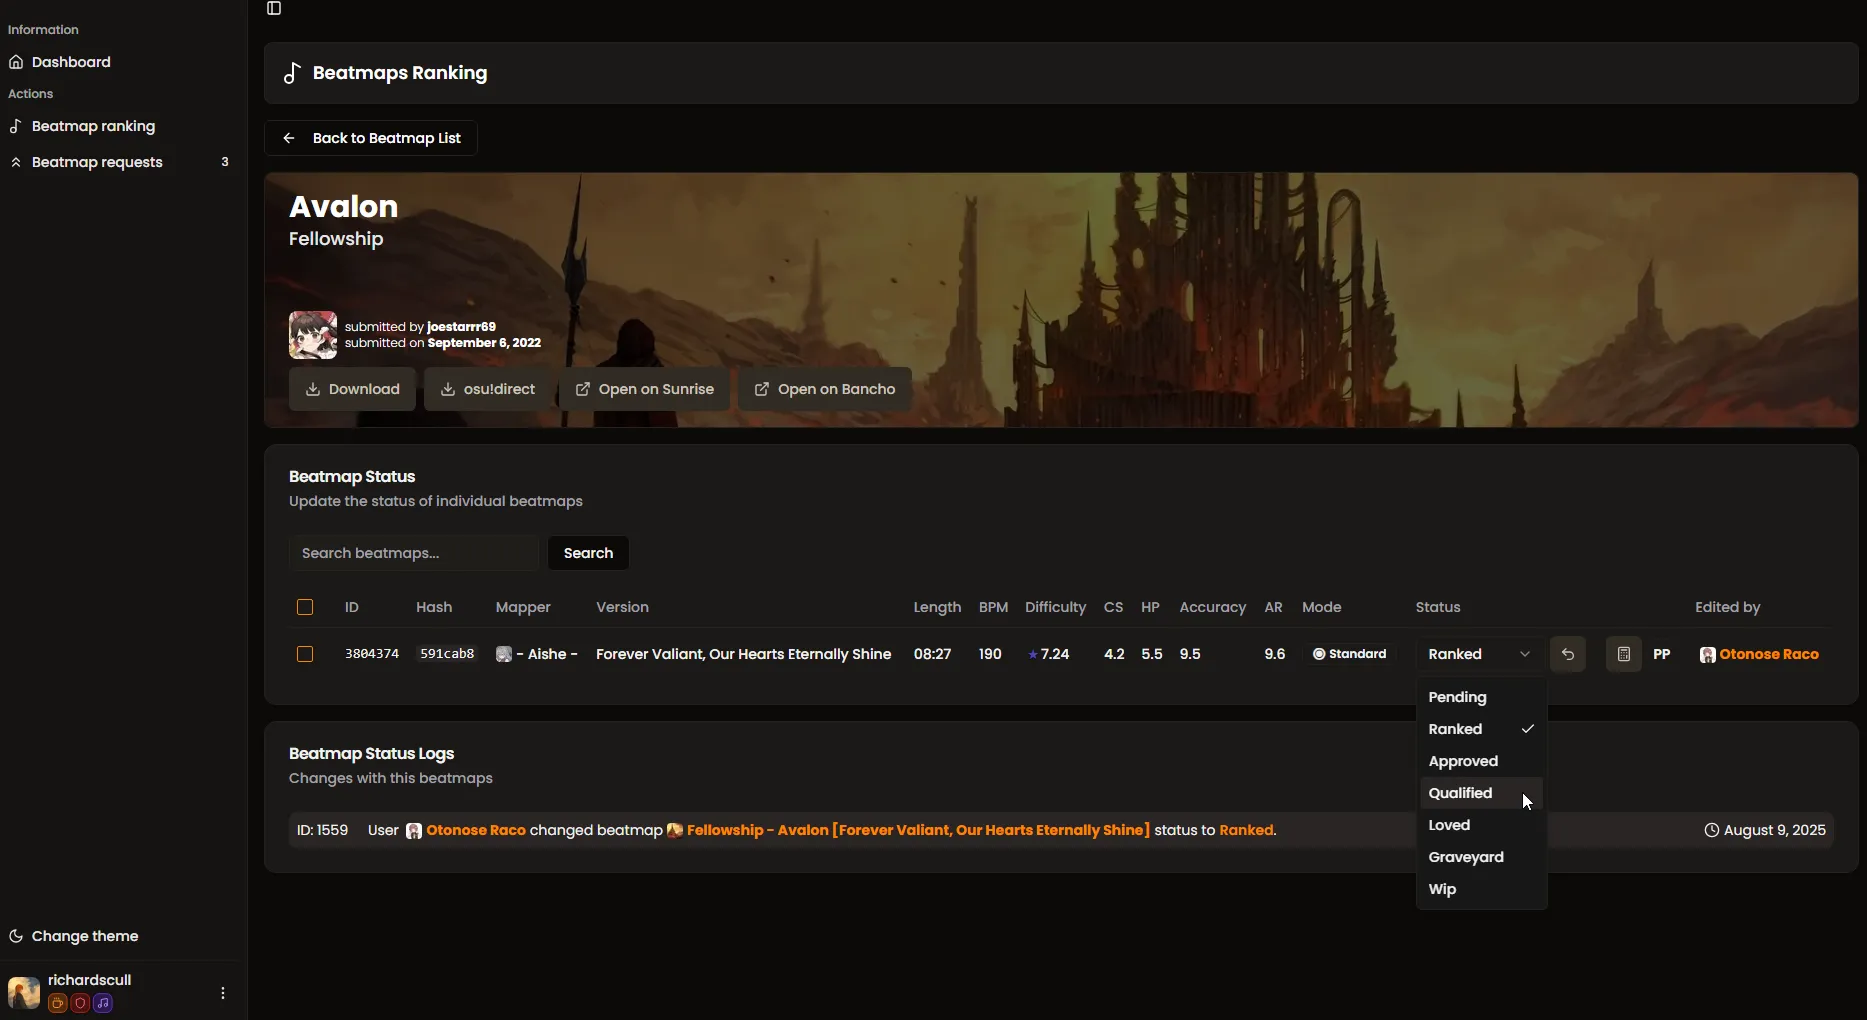
You can select multiple beatmaps and update their status in bulk. This is useful for approving or rejecting multiple beatmaps at once. Furthermore, you can also return their original status by clicking the arrow button next to the status dropdown.
You will also, from time to time (depending on the server load), get beatmap requests from players. You can view them in the Beatmap requests tab.
User Management
Section titled “User Management”You can view all users in the Users tab.
You can also search for a specific user by their username or ID.
Select a user by clicking on their name in the list.
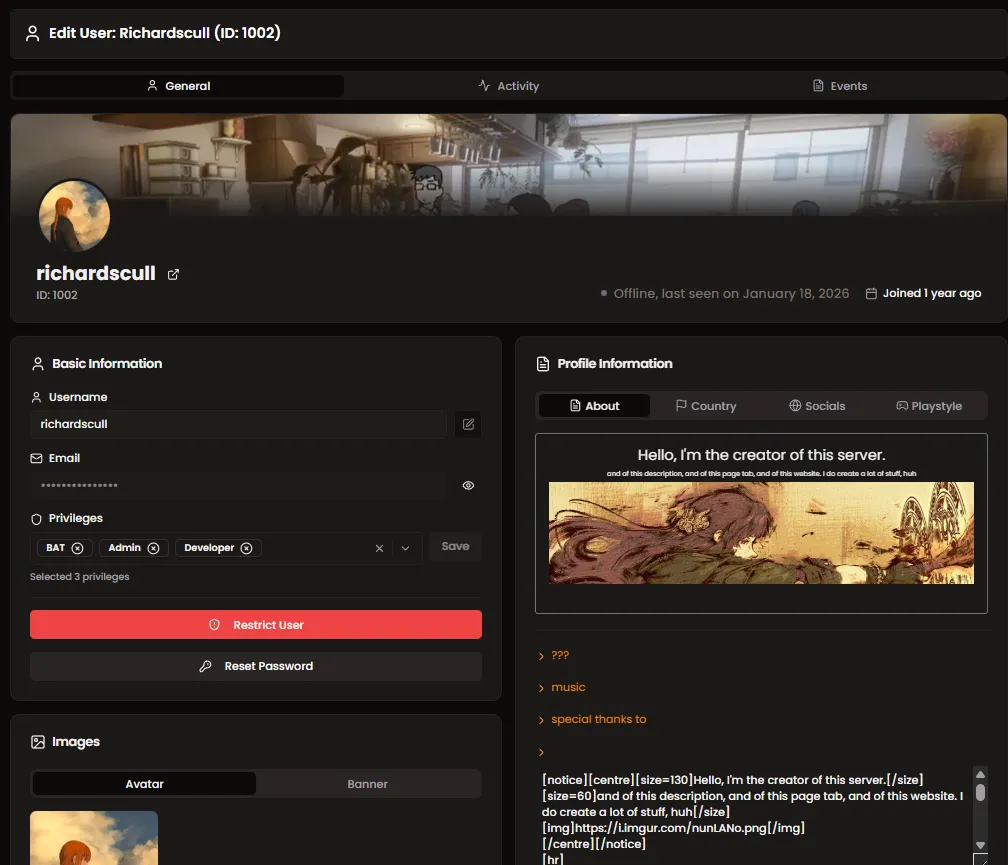
From here you can manage their privileges, restrict their access, etc.
Observatory (beatmap manager)
Section titled “Observatory (beatmap manager)”Adding Bancho API credentials for beatmap pulling capabilities
Section titled “Adding Bancho API credentials for beatmap pulling capabilities”To add Bancho API credentials for beatmap pulling capabilities, you can edit the .env file.
BANCHO_CLIENT_ID=your_client_idBANCHO_CLIENT_SECRET=your_client_secretYou can get the credentials by registering your application on the osu! API.
-
Go to the osu! API page and find the
OAuthsection.
-
Click on the
New OAuth Applicationbutton or pressEditif you already have an application created.
- If you are creating a new application, fill the
Application NameandApplication Callback URLsfields with any value, as they are not used by the server.
- If you are creating a new application, fill the
-
Copy the
Client IDandClient Secretvalues.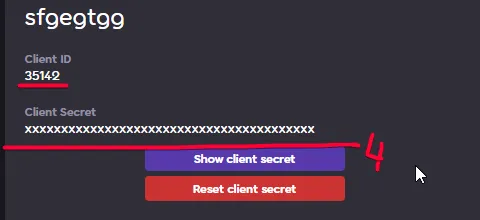
After that, don’t forget to restart the stack.
Removing some beatmap mirrors from the pool.
Section titled “Removing some beatmap mirrors from the pool.”By default, the server is configured to pull beatmaps from Bancho (if api credentials are provided), Mino, osu.direct and other mirrors.
If you want to remove some mirrors from the pool, you can edit the .env file as follows:
# Optional: If you need to disable one of the mirrors from usage, enters it's short name here.# Options: 'mino' | 'bancho' | 'direct' | 'gatari' | 'nerinyan' | 'osulabs';OBSERVATORY_MIRRORS_TO_IGNORE="osulabs,bancho"In this example, the server will ignore osulabs (canary mino instance) and Bancho mirrors when pulling beatmaps data.
Sunshine (Discord bot)
Section titled “Sunshine (Discord bot)”Adding Discord bot credentials
Section titled “Adding Discord bot credentials”To add Discord bot credentials, you can edit the .env file.
DISCORD_TOKEN=your_discord_tokenYou can get the token by creating a new application on the Discord Developer Portal.
Posting new scores/beatmap status changes to the chat messages
Section titled “Posting new scores/beatmap status changes to the chat messages”To post new scores/beatmap status changes to the chat messages, you can edit the .env file with IDs of the channels you want to post to.
SUNSHINE_NEW_SCORES_CHANNED_ID=your_channel_idSUNSHINE_BEATMAPS_STATUSES_CHANNED_ID=your_channel_idUploading bot emojis
Section titled “Uploading bot emojis”If you see missing emojis in the bot embedded messages, you need to upload them using Discord Developer Portal and change Sunshine/config/prod.json file with new emoji IDs.